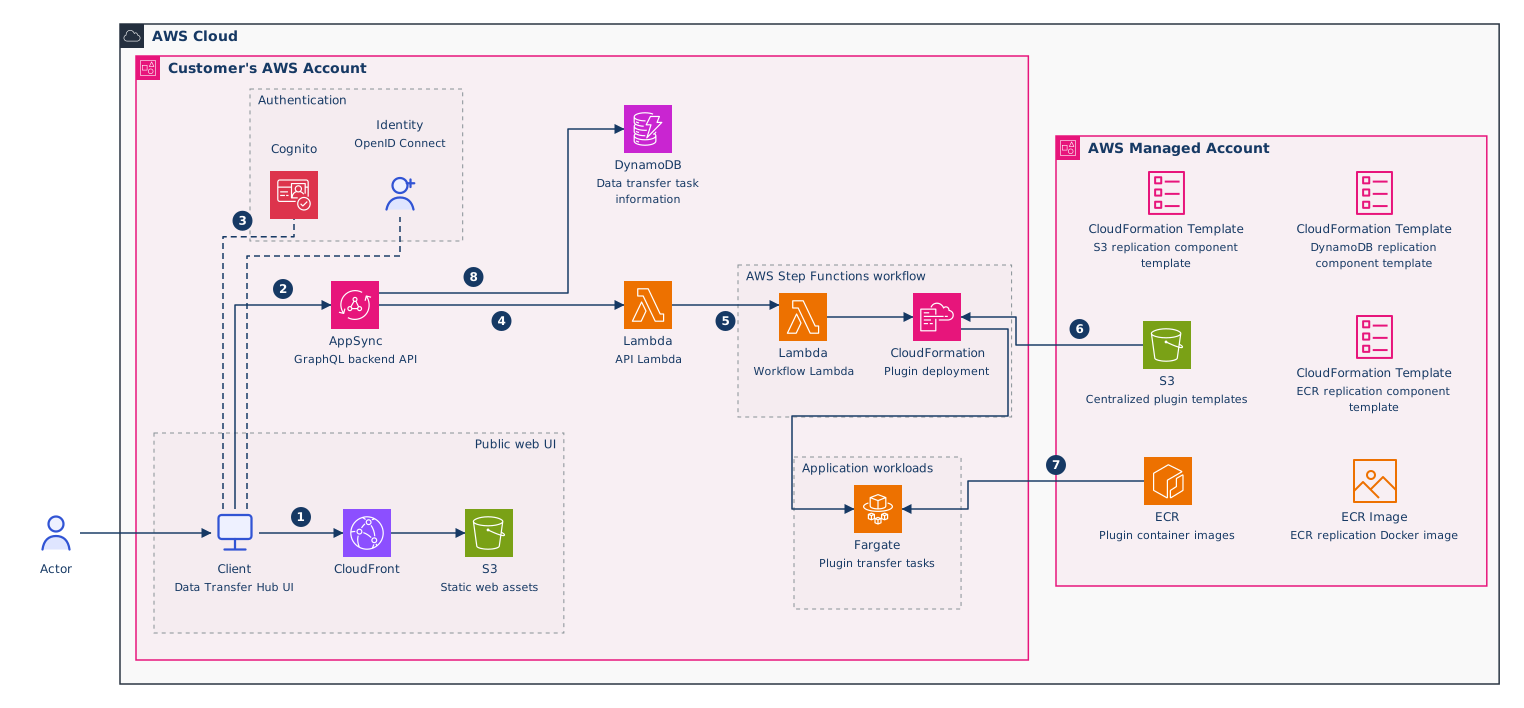
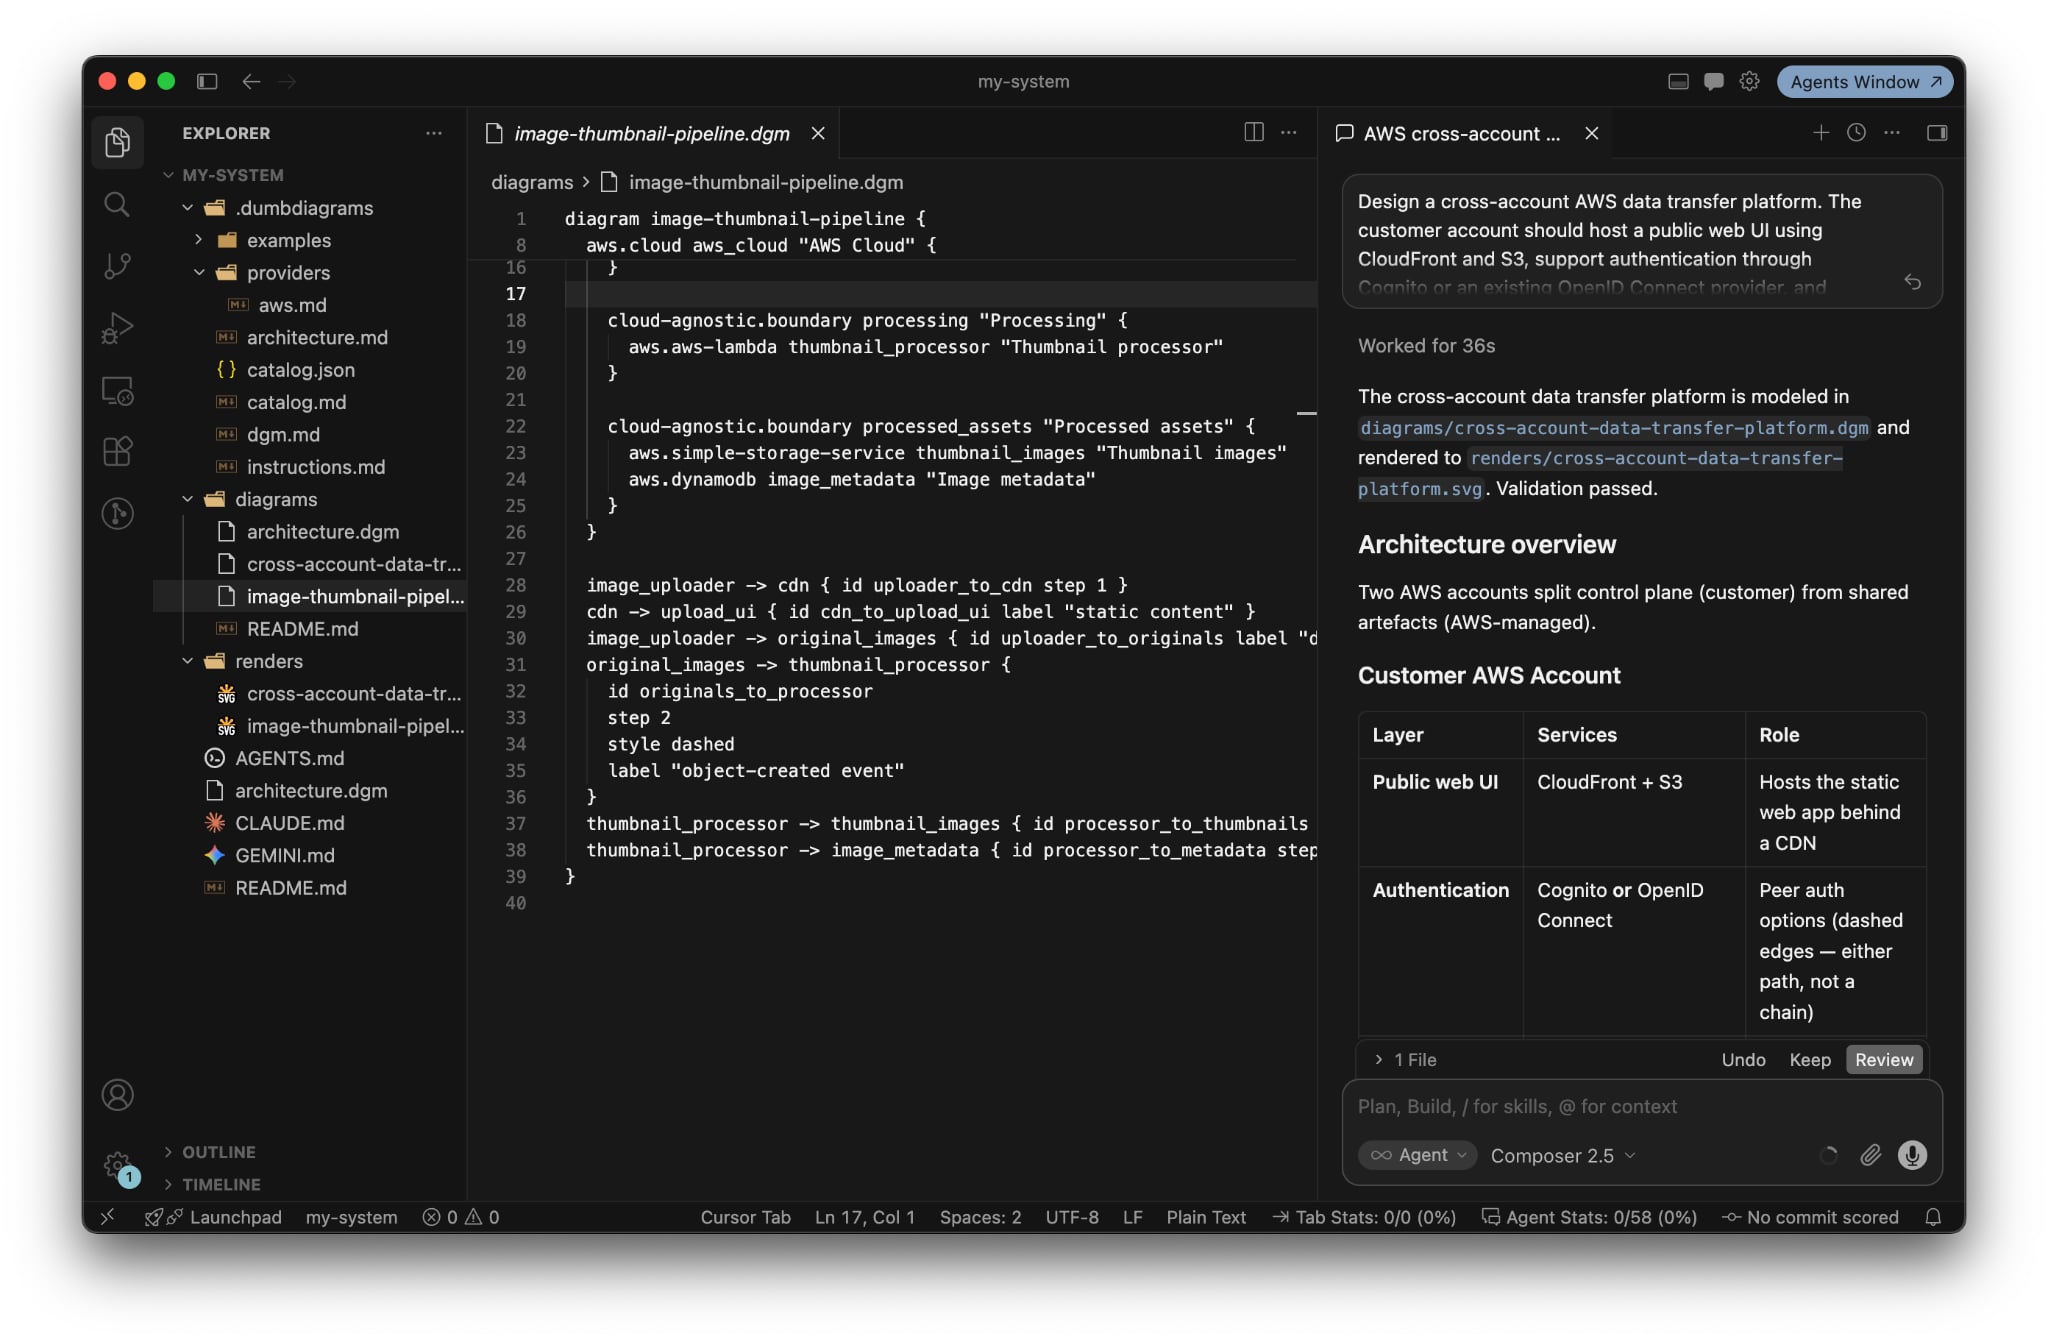
This example follows a real session from an empty project to a reviewed diagram. It used Cursor, but any coding agent that reads local instructions and edits files works the same way.
Create the project
npm install -g create-dumb-diagrams
dumbdiagrams init
init asks for a project name and creates the folder with .dumbdiagrams/
guidance, a diagrams/ workspace, and the agent entrypoint files.
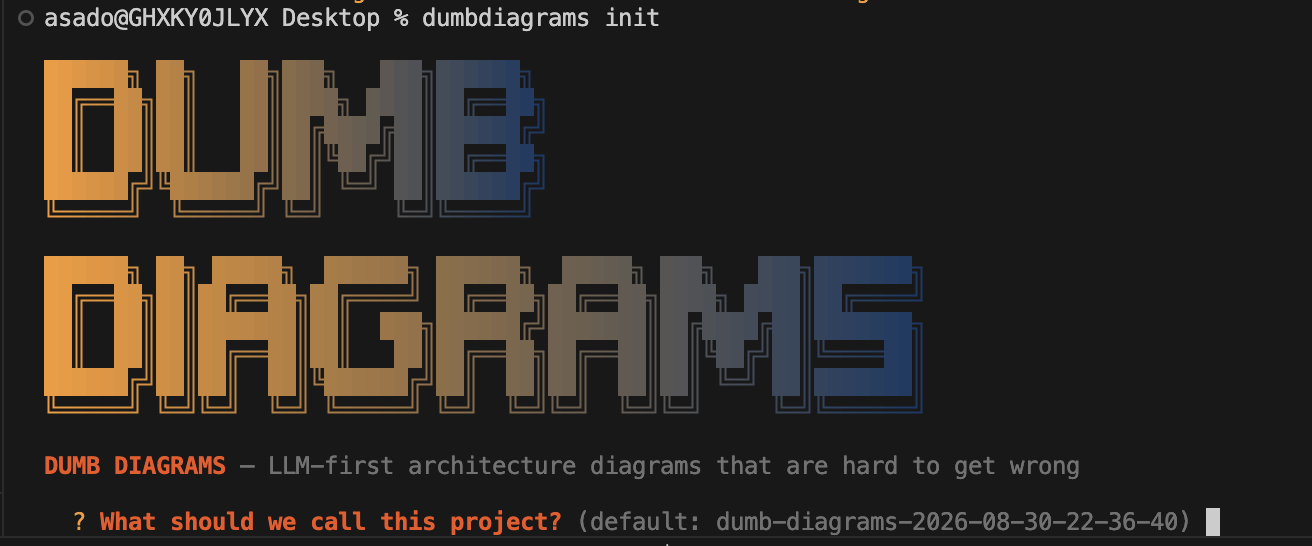
dumbdiagrams init run.Ask in plain English
Open the folder in your agent and ask it to read AGENTS.md. Then describe
the architecture. This was the request:
Design a cross-account AWS data transfer platform. The customer account should host a public web UI using CloudFront and S3, support authentication through Cognito or an existing OpenID Connect provider, and expose a GraphQL backend through AppSync. Use Lambda and Step Functions to orchestrate deployment of transfer plugins, and run the actual transfer workloads on Fargate. Store transfer task information in DynamoDB. Keep shared deployment templates and container artefacts in a separate AWS-managed account using S3, ECR, and CloudFormation templates.The request says what the diagram must communicate, not where shapes go. The
agent first writes an architecture-brief.md that records its interpretation:
the two accounts as separate boundaries, Cognito and OpenID Connect as
alternative peers, and the Step Functions workflow shown as a boundary rather
than an extra icon. Review the brief before the source: it is where a
misunderstanding is cheapest to fix.
Review the source
dgm 1
diagram aws-data-transfer-hub {
  grammar aws
  flow lr
  title "AWS Data Transfer Hub"

  cloud-agnostic.actor user "User"

  aws.cloud cloud "AWS Cloud" {
    aws.account customer "Customer's AWS Account" {
      cloud-agnostic.boundary auth "Authentication" {
        aws.cognito cognito "Amazon Cognito" { label-position top }
        cloud-agnostic.identity oidc "OpenID Connect" { label-position top }
      }

      aws.dynamodb state "Data transfer task information"

      cloud-agnostic.boundary frontend "Public web UI" {
        label-position top-right
        cloud-agnostic.client ui "Data Transfer Hub UI"
        aws.cloudfront cloudfront "Amazon CloudFront"
        aws.simple-storage-service ui_bucket "Static web assets"
      }

      aws.aws-appsync appsync "GraphQL backend API"
      aws.aws-lambda api_lambda "API Lambda"

      cloud-agnostic.boundary workflow "AWS Step Functions workflow" {
        aws.aws-lambda workflow_lambda "Workflow Lambda"
        aws.aws-cloudformation cloudformation "Plugin deployment"
      }

      cloud-agnostic.boundary workloads "Application workloads" {
        aws.aws-fargate fargate "Plugin transfer tasks"
      }
    }

    aws.account managed "AWS Managed Account" {
      aws.aws-cloudformation-template s3_component "S3 replication component template"
      aws.aws-cloudformation-template dynamodb_component "DynamoDB replication component template"
      aws.simple-storage-service templates "Centralized plugin templates"
      aws.aws-cloudformation-template ecr_component "ECR replication component template"
      aws.elastic-container-registry ecr "Plugin container images"
      aws.elastic-container-registry-image ecr_image "ECR replication Docker image"
    }
  }

  user -> ui { from s to w }
  ui -> cloudfront { step 1 }
  cloudfront -> ui_bucket
  ui -> appsync { step 2 from n to w }
  ui -> cognito { step 3 style dashed kind peer from n to s }
  ui -> oidc { style dashed kind peer from n to s }
  appsync -> api_lambda { step 4 }
  api_lambda -> workflow_lambda { step 5 }
  workflow_lambda -> cloudformation
  cloudformation -> fargate { from s to n }
  templates -> cloudformation { step 6 }
  ecr -> fargate { step 7 }
  appsync -> state { step 8 }
}
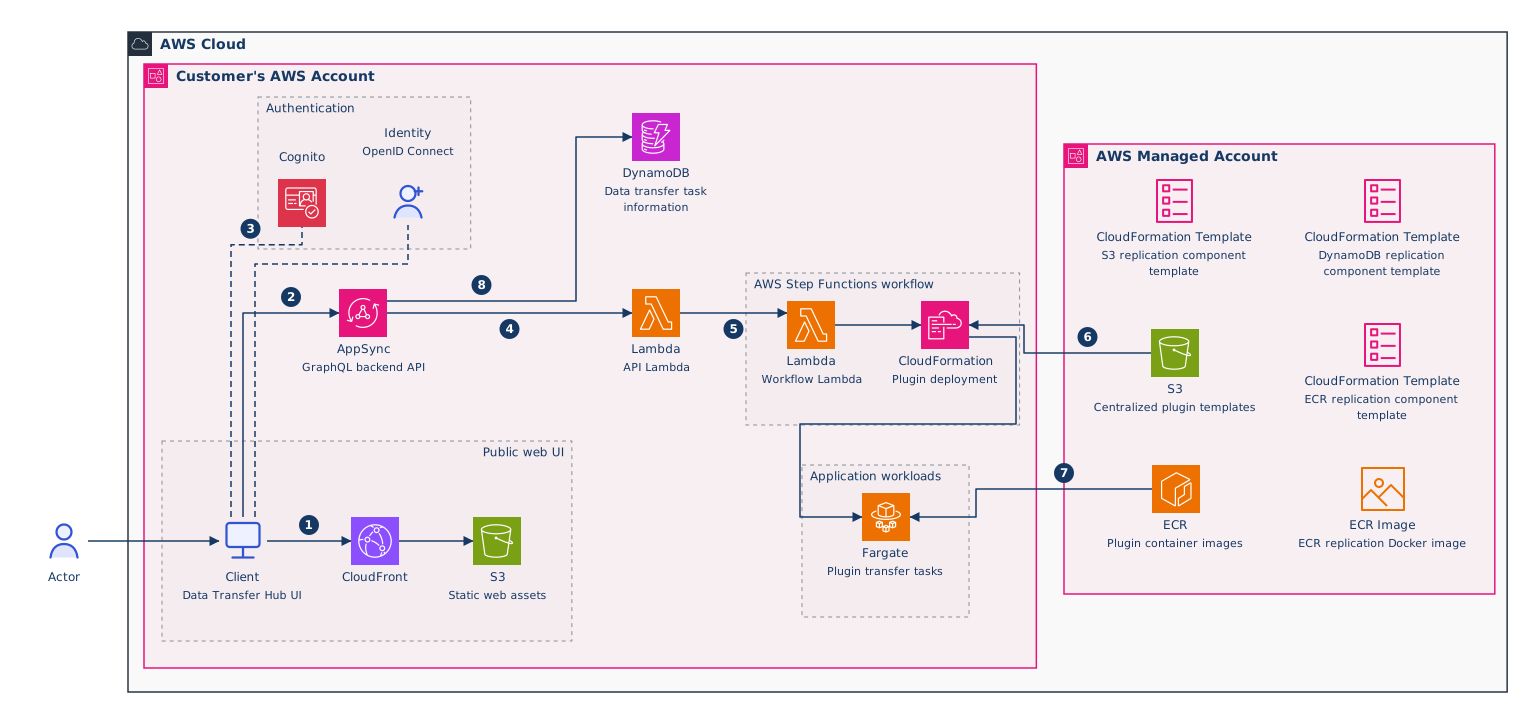
The numbered edges tell the main story: the user reaches the public UI, the UI calls AppSync, the API starts the deployment workflow, and the workflow launches transfer tasks. The managed account supplies templates and images without being merged into the customer account.
Download the source, its requirements contract, or the SVG.
Refine it in Studio
dumbdiagrams validate --strict diagrams/*/*.dgm
dumbdiagrams studio
Choose Open and check the account boundaries, the authentication alternatives, and the numbered flow. Anything you move or pin is saved in the same file.